Categories
Best practices General Tech

Staying Ahead Of Cyberattacks

Cyberattacks are becoming more sophisticated with the rise of the digital age, leading to more targeted and frequent breaches. From individuals to large organizations, everyone is a potential target – no one is safe. Staying ahead of cyberattacks requires not only understanding about existing cyber threats but also implementing effective measures to protect and secure important data and information from intruders. This article will simplify what cyberattack means to you, help you explore the types and sources of cyberattacks, highlight measures for staying safe, and discuss growing challenges and trends in cybersecurity.

What is a Cyberattack?

In its basic definition, a cyberattack is generally an attempt by malicious individuals or groups to gain unauthorized access to computers, networks, or data. These kinds of attacks often aim at stealing, disrupting, or destroying information or leveraging it for financial or political gain.

Types of Cyberattacks

Cyberattacks come in many flavors and faces, with different methods and intentions. Here are the common types:

Phising

Photo from Pixabay

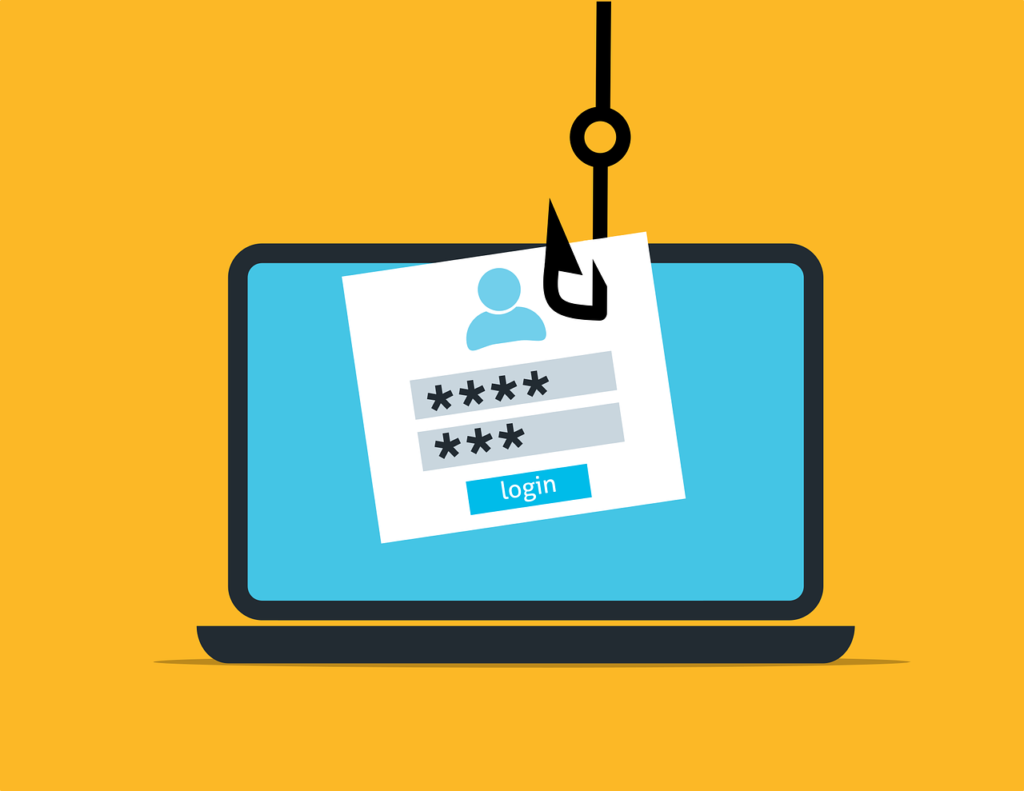
This attack is one of the common cyberattacks in which phishing attacks, attackers impersonate any credible entity through emails, messages, or websites and influence people to reveal sensitive passwords or credit card details, etc. Usually, these attacks involve psychological means, social engineering, whereby conditions for urgency or fear are attached to prompt victims into precipitating actions such as clicking malicious links or downloading harmful attachments.

Common Types of Phishing Attacks

  1. Email Phishing: The most common method in which an attacker sends thousands of emails that are originally from seemingly legitimate sources, containing links to fake web pages designed to capture user credentials.
  2. Spear Phishing: A targeted attack at specific individuals or organizations utilizing personalized information to gain credibility. This method poses a great danger since it is addressed to high-level executives.
  3. Whaling: A form of spear phishing targeted at high-profile targets, such as the CEO or CFO, by using their authority to gain access to sensitive information from employees.
  4. Smishing and Vishing: These are phishing methods via SMS (smishing) or voice calls (vishing), in which the attackers deceive victims into revealing personal information either over the phone or via text messages.
  5. Clone Phishing: Entails the almost exact reproduction of an already sent legitimate email from a trusted organization but this time with malicious links.

Instances of some phishing attacks

  1. The Google and Facebook Phishing Attack 

A Lithuanian scammer defrauded Google and Facebook of $100 million between 2013 and 2015 by sending fake invoices that appeared to be legitimate requests from a Taiwanese supplier, Quanta. The fraud was discovered, arrests were made, but only $49.7 million was recovered.

2. Elara Caring Incident

In 2020, healthcare provider Elara Caring became the target of a phishing attack where the personal data of over 100,000 patients was compromised. The attackers accessed employee email accounts through phishing tactics targeting two employees.

3. Levitas Capital Whaling Attack

This was a whaling attack in 2020 which involved the co-founder of Levitas Capital through a fraudulent zoom link. The incident turned into malware deployment on the corporate network and the appearance of fraudulent invoices for approximately $8.7m.

Malware

Photo from Pixabay

Malware refers to a wide range of malignant software programs that are written to infect and destroy systems. The common types are:

  1. Viruses: Malicious code attached to clean files that spread to a computer system.
  2. Ransomware: A kind of malware that encrypts the files on the victim’s device and demands payment for the decryption keys.
  3. Spyware: Software used to secretly observe user activity and gather personal information without consent.

Phishing attacks are often the initial vector for malware distribution, with many ransomware incidents starting from phishing emails. 

An instance of this kind of attack is the ransomware attack against the Colonial Pipeline in May 2021 which disrupted fuel supply across the U.S. East Coast for nearly a week. The attack vector had been linked to phishing emails that gave the DarkSide gang an entrance into the company’s systems, which eventually made the company pay a ransom of $4.4 million1.

Denial of Service (DoS) and Distributed Denial of Service (DDoS)

The intent of Denial of Service attacks is to make the network or server unavailable for the authorized users by overwhelming it with traffic. This is augmented in DDoS to involve hundreds of compromised systems or ‘botnets’ to literally flood the target with requests, with which the defenses may hardly cope. A notable DDoS attack occurred in October 2016 against Dyn, a major DNS provider, which disrupted services for many high-profile websites like Twitter and Netflix for several hours.

Man-in-the-Middle and Insider Attacks

In Man-in-the-Middle (MitM) attacks, cyber criminals intercept communications between two parties to steal data or inject malicious content. Insider attack: When employees or contractors misuse their access rights to harm the organization or steal sensitive information. An example is the ransomware attack the City of Atlanta suffered in March 2018 initiated through spear phishing emails sent from compromised accounts of trusted contacts within the city government.

Social Engineering and Credential Stuffing

Social engineering is a method of tricking people into revealing confidential information by gaining their confidence. Credential stuffing refers to when an attacker uses stolen credentials from one breach to access accounts on other platforms where users have reused passwords. This technique leverages the common user behavior of password reuse, thus simplifying the process for the attacker to gain unauthorized access. In 2016, attackers exploited stolen credentials from previous breaches to access accounts at various online services, leading to widespread unauthorized access incidents across multiple platforms.

 Zero-Day Exploits

Zero-day exploits involve those vulnerabilities in software that the developers are unaware of at the time the attack occurs. These exploits tend to be exceptionally effective because they can be utilized at a time before patches become available, which leaves the systems vulnerable until they get updated. The 2017 Equifax data breach was partly attributed to an unpatched vulnerability in Apache Struts software, which attackers exploited before Equifax could deploy a fix.

Advanced Persistent Threats (APTs)

APTs are long-term targeted attacks where hackers infiltrate networks and remain undetected for extended periods. Their goal is usually data theft or surveillance of operations over time, making them particularly dangerous for organizations that handle sensitive information. The infamous APT group APT28 (Fancy Bear) has been linked to numerous high-profile cyber espionage campaigns targeting government entities and organizations around the world, including the Democratic National Committee during the 2016 U.S. presidential election.

What Motivates Cyberattacks?

Motivations behind cyberattacks vary and may include one or many of the following:

  1. Financial Benefits:  Most the attackers seek ransom through ransomware, phishing, or even selling stolen data on the dark web.  
  2. Revenge/Personal Vendetta: Disgruntled employees, ex-partners, or competitors target organizations or people.
  3. Hacktivism: Attacks for political, social, or ideological motives to bring attention to a cause or disrupt an adversary. 
  4. Terrorism: Cyberterrorists disrupt critical infrastructure-such as energy grids, transportation systems, or healthcare services-to instill fear in a population. 
  5. Thrill-Seeking or Fame: Some attackers seek the challenge or notoriety associated with a successful breach of a high-profile system.  
  6. Market Manipulation: Businesses or markets are targeted by hackers to manipulate stock prices, cryptocurrencies, or commodities for financial gain.  
  7. Corporate Sabotage: Competitors may wish to attack any given rival business for the purpose of damaging its reputation, disrupting operations, or attracting some of its clients.  
  8. Political Influence: These are usually employed to influence the outcome of an election, manipulate public opinion, or bring instability to governments. 

How to Stay Ahead of Cyber-attacks

The nature of the threat means that the best way to protect oneself or one’s organization against it is through proactive measures. Some such key measures include:

  1. Be security conscious: Use strong passwords by creating unique, complex passwords and change regularly.  Also add another layer of security to your accounts by enabling Two-Factor Authentication (2FA), Encrypt data so that only authorized parties can read it. From email encryption, encryption of data in transit, or encryption of data at rest, it ensures that even if attackers intercept your data, they can’t understand or misuse the data without the encryption keys.
  2. Put early warning systems in place: Put in place mechanisms that can monitor for potential threats in real time and send an alert. 
  3. Back-up data and update software regularly: Perform regular backups that will let you recover your information in case of an attack. Install updates and patches that will close vulnerabilities in your systems. Ensure that any new software and systems are thoroughly tested in isolated environments to avoid vulnerabilities before going live (this is called Cleanroom testing).
  4. Train and educate: Educate yourself and your team regularly about state-of-the-art threats and security best practices. Provide training and awareness on being very cautious before trying to click on suspicious links or attachments that come from unknown sources.  
  5. Continuous Vulnerability Assessments: Regularly scan and identify weaknesses in your infrastructure to address them promptly. Simulate cyberattacks to evaluate the effectiveness of your defenses and uncover potential vulnerabilities.
  6. Security conferences and newsletters: Participate in security webinars, conferences to gain an invaluable opportunity to learn from experts and peers about emerging threats, trends, and best practices. Common security newsletters are also good sources of information to help you stay informed about current and future threats.
  7. Lead with intelligence and creativity: Utilize advanced analytics along with innovative methods to identify and neutralize emerging malicious activities. Embrace a security model wherein no one is trusted by default, and everybody’s request to access should be authenticated.  
  8. Be prepared to defend your fort: Incident response plans should be kept maintained and your team prepared to take immediate action upon threat detection.  
  9. “Shine your eye”: This is a security slang from Nigeria, that talks about knowing what to do to avoid danger, this can be applied to cyberattacks too, as one can ensure that there is knowledge of the current tools and ways attackers use to steal data and infiltrate systems.
  10. Context-aware security: Context-aware security adjusts its level of protection according to the situational or environmental context where access is being requested. If a user logs in from an unrecognized location or device, for instance, the system may prompt further verification or block the access. This ensures that only authorized users interface with sensitive systems, further reducing breach chances. 
  11. Behavioral analytics tools: These solutions monitor and analyze user behavior to identify unusual activities that could signal a security threat. For instance, if an employee suddenly starts to download unusually large volumes of sensitive data or accesses systems that they do not normally use, then the tool can flag this behavior for investigation. Behavioral analytics are a critical layer of defense against insider threats and advanced persistent attacks.

Challenges and Trends To Keep Tabs On

Technology, and its development, means the continuously changing landscape of cybersecurity attacks also. To counter the probable risks, every organization needs to be on their toes and gain as much information as possible on upcoming challenges and trends that influence cybersecurity. The following areas present important concerns driving the direction in the field of cybersecurity today.

  1. A.I Driven Attacks: AI is being weaponized increasingly by cybercriminals to make their attacks more sophisticated and effective. Hackers utilize deepfake technology to create fake but realistic audio and video contents, which, in turn, mislead their targets into revealing sensitive information or executing unauthorized transactions. One instance of the CEO scam happened when the attacker was mimicking a CEO’s voice asking employees for wire transfers. With AI tools generating highly personalized phishing emails resembling human communications in both style and content, they become a lot more plausible, often replete with riveting storytelling and urgent requests for action-compelling events that might easily persuade the gullible beyond ordinary phishing. AI-powered malware can change its behavior to avoid detection by traditional security measures. The ability of malware to adapt to new situations makes it difficult for organizations to detect and neutralize threats effectively.
  2. IoT and Smart Device Vulnerabilities: The increasing use of Internet of Things (IoT) devices and modern connected-vehicle technology makes more vehicles smarter, but it opens greater avenues for security exploitations and cyber-attacks. Most IoT devices are designed with either very poor default passwords or no regular software updates, thus being highly vulnerable for any kind of exploitation. Attackers compromise such devices to create botnets for launching DDoS attacks or to steal sensitive data. Cyber criminals might use vulnerability in vehicle software to take control over the vehicles unauthorized. Connected vehicles may be tracking several information sets which can become a victim of theft and misuse.
  3. Cyber-Physical System Attacks: Cyber-physical systems, incorporating physical processes with networked computing, are increasingly targeted by cybercriminals. Examples include everything from critical infrastructure like power grids, transportation systems, and autonomous vehicles.
  4. Human Error and Third-Party Risks: Poor training and awareness result in employees sometimes doing silly things, like clicking on a phishing link or mishandling information. The Solar Winds breach is an example of attackers breaching a trusted third-party vendor to gain entry into several organizations at the same time.
  5. Scarcity of Qualified Professionals in Cybersecurity: The increasing demand for cybersecurity has developed a serious gap in skilled professionals within the industry. Organizations struggle to find qualified personnel who can defend against these increasingly sophisticated attacks.

Cybersecurity is an ever-evolving field-one that requires watching out, preparing for, and adapting to constantly changing elements. By understanding cyberattacks, staying up-to-date on the latest trends, and putting in place some tough security, you can make yourself and your organization resilient in the face of potential compromise. Remember, the best defense is a proactive one-stay sharp, stay informed, and stay secure.

Categories
Tech Tech For Good

 Emerging Trends in Technology

The trends in technology are vast. We have since grown from the invention of ICs, Transistors, and Microprocessors to the Internet in the 1990s. Most especially the late 1950s and early 1960s marked a pivotal era as Integrated Circuits, commonly known as ICs invented by Jack Kilby and Robert Noyce were used to power the digital revolution.

Some Notable Trends In Technology

Health-tech

The Healthcare Industry has experienced a massive improvement in patient healthcare services due to recent trends in technology.

Technologies like brain-computer interfaces (BCIs) are being developed to help individuals with disabilities control prosthetics or communicate through thought alone. Companies like Neuralink are at the forefront of this innovation, aiming to treat neurological conditions and potentially enhance cognitive capabilities.

Biotechnology leverages biological systems to develop products and solutions for healthcare, agriculture, and more. CRISPR gene editing, for instance, allows for precise modifications to DNA, offering potential cures for genetic disorders. Editas Medicine and CRISPR Therapeutics are pioneering this field, promising revolutionary treatments.

Quantum Computing Technologies

Quantum computers use the principles of quantum mechanics to perform calculations at unprecedented speeds. These computers can solve complex problems in cryptography, material science, and pharmaceuticals. Companies like IBM and Google are making significant strides, with IBM’s Quantum Experience and Google’s Sycamore processor leading the charge.

Artificial Intelligence (AI)

Artificial Intelligence (AI) is transforming industries by automating tasks, providing insights through data analysis, and enabling new levels of personalization. OpenAI’s GPT-4 and Google’s DeepMind are examples of AI systems pushing the boundaries of what machines can do.

AI-powered virtual assistants like Amazon’s Alexa, Apple’s Siri, and Google Assistant are becoming increasingly sophisticated. They help users with tasks ranging from setting reminders to controlling smart home devices, providing a more intuitive and interactive user experience.

Knowledge graphs organize information in a way that machines can understand, enabling better data analysis and AI applications. Companies like Google use them to improve search results and enterprises to enhance data management.

Smart Spaces

Digital twins are virtual replicas of physical objects or systems that support real-time monitoring and simulation. They are used in various industries, including manufacturing, healthcare, and urban planning, to optimize performance and predict maintenance needs. Siemens and General Electric are leaders in developing digital twin technologies.

Smart spaces integrate digital and physical environments to create interconnected, intelligent systems. These include smart homes, cities, and workplaces that enhance convenience, safety, and efficiency. Companies like Cisco and Microsoft are developing solutions to integrate IoT devices and AI to create smart spaces.

Autonomous Vehicles

Self-driving cars, flying cars, and drones represent significant advancements in transportation and logistics. They promise to reduce accidents, improve traffic management, and increase delivery efficiency. Tesla’s Autopilot and Waymo’s self-driving cars are leading examples of autonomous vehicle technology.

Computer Vision

Recent developments in computer vision enable machines to interpret and make decisions based on visual data. Applications include facial recognition, autonomous navigation, and quality inspection in manufacturing. Companies like NVIDIA and Intel are advancing computer vision capabilities and integrating them into various products and services.

Blockchain and Decentralized Identity

Blockchain technology provides a secure, decentralized ledger for recording transactions. It is the foundation of cryptocurrencies like Bitcoin and Ethereum, and it also has applications in supply chain management, finance, and digital identity. Companies like IBM and ConsenSys are exploring diverse use cases for blockchain technology.

The Decentralized Identity approach allows individuals to control their personal information without relying on central authorities. Blockchain technology underpins decentralized identity solutions, providing enhanced privacy and security. Projects like Microsoft’s Decentralized Identity and Sovrin Network are pioneering this field.

Renewable Tech and Sustainable Tech

Technologies focused on harnessing renewable energy sources like solar, wind, and hydropower are crucial for a sustainable future. Companies like Tesla (with its solar products) and Vestas (wind turbines) are at the forefront of renewable tech.

Sustainable Tech involves developing technologies that minimize environmental impact and promote sustainability. Innovations in this area include biodegradable materials, energy-efficient systems, and circular economy solutions. Companies like Patagonia and Beyond Meat are examples of businesses integrating sustainable tech.

Green Technology focuses on reducing environmental impact through innovation. This includes everything from electric vehicles to green building materials. Tesla’s electric cars and LEED-certified buildings are prominent examples of green technology.

No Code Development

No-code platforms enable users to create applications without needing to write code. This democratizes software development, allowing more people to build solutions. Platforms like Bubble and Webflow are making no-code development accessible and powerful.

Internet of Behaviour (IoB)

Internet of Behaviour (IoB) combines data from various sources to influence behavior. It uses data analytics and behavioral science to understand and guide user actions. Applications include personalized marketing, healthcare interventions, and workplace productivity tools.

Benefits of Emerging Technologies to the Tech World

Innovation and Efficiency

Emerging technologies drive innovation, leading to the creation of new products and services. They enhance efficiency in various processes, reducing costs and time.

Problem-Solving

They offer solutions to complex problems, from healthcare to climate change, improving the quality of life and sustainability.

Economic Growth

By fostering new industries and job creation, emerging technologies contribute to economic growth and competitiveness.

Accessibility and Connectivity

Technologies like 5G and blockchain improve connectivity and accessibility, enabling more people to participate in the digital economy.

Challenges Posed by Emerging Technologies to the Tech World

Security and Privacy

As technology advances, so do the risks of cyberattacks and data breaches. Protecting sensitive information becomes increasingly complex.

Ethical Concerns

Issues such as AI bias, surveillance, and the impact on employment raise significant ethical questions.

Regulation and Compliance

Keeping up with rapid technological advancements poses challenges for regulatory bodies to ensure safety and compliance without stifling innovation.

Environmental Impact

The production, use, and disposal of new technologies can endanger the environment if not managed sustainably.

Remember, as these technologies evolve, staying informed and adaptable will be crucial for leveraging their full potential and addressing the critical challenges they pose.

Categories
General How-Tos Software Tech

Creating Custom React Hooks – Oyinkansola Odunsi

If you’re not new to React, you probably know about or have used hooks like useState and useEffect before. However, do you know that you can create your own hook? Yes, you heard that right! And this is what this article is about. 

Also, if you’re a newbie to JavaScript library, I’ve got you covered! I’ll bring you up to speed on the existing React hooks, and help you understand how to create yours. Let’s dive right in.

WHAT ARE REACT HOOKS?

The React library is commonly used because it’s easy to handle. One of this library’s excellent functionalities is React hooks. In simple terms, React hooks are JavaScript functions that allow you to access state and other React features without writing a class. 

These functions can also used to isolate the reusable parts of functional components. Additionally, they are identified by the word use, followed by the superpowers they possess like DebugValue, Effect, Callback, and LayoutEffect

THE EXISTING REACT HOOKS

The latest React version (version 18) has 15 built-in hooks that you can use. The most commonly used hooks are useState, useEffect, and useContext. Here is a list and a summary of all the existing React hooks:

  1. useCallback: Returns a memoized (stored to avoid repeated computation) callback function so that the child component that depends on the function will not re-render unnecessarily. The function will only be recreated if one of its dependencies changes.  
  2. useContext: After creating a context, useContext allows you to use a value in the context further down in your functional components. So, you don’t have to manually pass props down your component tree. 
  3. useDebugValue: Helps you label the output of your custom hooks so you can easily understand their state and monitor their behaviour in React DevTools.
  4. useDeferredValue: Useful for prioritizing the responsiveness of your user interface by deferring long-running operations that might affect the performance of your application.
  5. useEffect: This hook handles side effects in your functional components. Side effects include fetching data, setting up event listeners, and DOM manipulation. 
  6. useId: Helps you generate unique IDs across your React application.
  7. useImperativeHandle: Allows you to specify the properties of a component that should be exposed when using refs.
  8. useInsertionEffect: This makes it easy for you to execute a function after a component has been added to the DOM.
  9. useLayoutEffect: It works similarly to useEffect, but it’s synchronous. You can use it to make changes on your DOM immediately when it’s updated, and before the browser displays content on a user’s screen. 
  10. useMemo: It is used to memoize the result of expensive computations to avoid unnecessary recalculations.
  11. useReducer: Instead of using useState you can use useReducer to handle more complex state logic within a functional component.
  12. useRef: Helps you create mutable references that you can access across multiple renders of a functional component. 
  13. useState: Allows you to manage the state within a functional component.
  14. useSyncExternalStore: This hook allows you to read and subscribe to an external data store.
  15. useTransition: Helps you manage asynchronous updates to a React application’s UI.

WHY DO WE NEED CUSTOM HOOKS?

Don’t get me wrong, this article is not to say that the in-build React hooks are not sufficient. React has all these powerful hooks that will serve you well. Nonetheless, I can’t deny the reality that custom hooks can greatly improve the readability and overall quality of your code.

Let’s open up this fact a little bit by highlighting why you might need a custom hook:

  • It makes logic reusable.
  • It allows you to use other hooks provided by React.
  • You can easily separate your logic from your UI.
  • You can break down complex stateful logic into simple chunks of code that are easy to maintain.
  • You can test specific parts of your stateful logic because custom hooks can be debugged in isolation.

TIPS FOR CREATING CUSTOM REACT HOOKS

Here are some tips to keep in mind to ensure your custom hooks are flexible, reusable, and easy to understand.

  • Follow the naming convention by starting with use.
  • Repeated/reusable logic within your components should be your custom hooks candidates.
  • Feel free to use the built-in React hooks where necessary.
  • Make sure a hook is focused on one responsibility instead of multiple functions.
  • Your hooks should have value or functions that components can use.
  • Ensure your hooks can accept parameters so you can easily customize their behaviour.
  • Test your hooks in different scenarios to ensure they are performing as expected. You can use tools like Jest and/or the React Testing Library.
  • Document your hook and succinctly explain its function.

CREATING YOUR FIRST CUSTOM HOOK

Step 1: Define Your Hook

Let’s create a custom React hook that would allow our application toggle between light and dark mode (our reusable logic). To begin, we create a JavaScript file to define our hook.

import { useState, useEffect } from 'react';
function useDarkMode() {
  const [isDarkMode, setIsDarkMode] = useState(false);
  useEffect(() => {
    const body = document.body;
    if (isDarkMode) {
      body.classList.add('dark-mode');
    } else {
      body.classList.remove('dark-mode');
    }
  }, [isDarkMode]);
const toggleDarkMode = () => {
    setIsDarkMode(prevMode => !prevMode);
  };
  return [isDarkMode, toggleDarkMode]:
}
export default useDarkMode;

Step 2: Use Your Custom Hook

Now, we can use our custom hook in our React component.

import React from 'react';
import useDarkMode from './useDarkMode';
function App() {
  const [isDarkMode, toggleDarkMode] = useDarkMode();
  return (
    <div className="App">
      <button onClick={toggleDarkMode}>
        Toggle Dark Mode
      </button>
      <div className={isDarkMode ? 'dark-mode' : 'light-mode'}>
        {isDarkMode ? 'Dark Mode' : 'Light Mode'}
      </div>
    </div>
  );
}
export default App;

Step 3: Test Your Hook

To carry out the test, you’ll have to install the Jest and the React Testing Library using:

npm install --save-dev @testing-library/react @testing-library/jest-dom jest

Then, we’ll create a test file for our custom hook. Let’s call it useDarkMode.test.js.

We’ll proceed to use the renderHook and act utilities in our React Testing Library to test our hook.

import { renderHook, act } from '@testing-library/react-hooks';
import useDarkMode from './useDarkMode';


describe('useDarkMode', () => {
  test('should toggle dark mode correctly', () => {
    const { result } = renderHook(() => useDarkMode());
    // Initial state should be light mode (isDarkMode: false)
    expect(result.current[0]).toBe(false);
    expect(document.body.classList.contains('dark-mode')).toBe(false);
    // Toggle to dark mode
    act(() => {
      result.current[1](); // toggleDarkMode
    });
    expect(result.current[0]).toBe(true);
    expect(document.body.classList.contains('dark-mode')).toBe(true);
    // Toggle back to light mode
    act(() => {
      result.current[1](); // toggleDarkMode
    });
    expect(result.current[0]).toBe(false);
    expect(document.body.classList.contains('dark-mode')).toBe(false);
  });
});

Next, add Jest to your package.json file as follows, then run npm test to confirm that the useDarkMode hook is running as expected:

"scripts": {
  "test": "jest"
}

Step 4: Document Your Custom Hook

Document how your custom hook works and include details like its parameters and return values.

CREATING A DATA FETCHING CUSTOM HOOK

Now that you have an idea of how to create a custom React hook, let’s build another common custom hook (a data fetching hook) to further reinforce our knowledge. Shall we?

Step 1: Create the hook.

We’ll call it useFetch.js. This custom hook is commonly used to allow several components to fetch data from an API.

import { useState, useEffect } from 'react';


function useFetch(url) {
  const [data, setData] = useState(null);
  const [loading, setLoading] = useState(true);
  const [error, setError] = useState(null);


  useEffect(() => {
    const fetchData = async () => {
      setLoading(true);
      try {
        const response = await fetch(url);
        if (!response.ok) {
          throw new Error('Network response was not ok');
        }
        const data = await response.json();
        setData(data);
      } catch (error) {
        setError(error);
  } finally {
        setLoading(false);
      }
    };
    fetchData();
  }, [url]);


  return { data, loading, error };
}
export default useFetch;

Step 2: Use your new hook in a component.

import React from 'react';
import useFetch from './useFetch';
function App() {
  const { data, loading, error } = useFetch('https://api.google.com/data');
  if (loading) return <div>Loading...</div>;
  if (error) return <div>Error: {error.message}</div>;
  return (
    <div>
      <h1>Data:</h1>
      <pre>{JSON.stringify(data, null, 2)}</pre>
    </div>
  );
}
export default App;

Step 3: Test and document your custom hook.

import { renderHook } from '@testing-library/react-hooks';
import useFetch from './useFetch';
// Mock the fetch function
global.fetch = jest.fn(() =>
  Promise.resolve({
    ok: true,
    json: () => Promise.resolve({ data: 'mocked data' }),
  })
);
describe('useFetch', () => {
  afterEach(() => {
    fetch.mockClear();
  });
  it('should return data after fetch', async () => {
    const { result, waitForNextUpdate } = renderHook(() => useFetch('https://api.example.com/data'));
    expect(result.current.loading).toBe(true);
    await waitForNextUpdate();
    expect(result.current.loading).toBe(false);
    expect(result.current.data).toEqual({ data: 'mocked data' });
    expect(result.current.error).toBe(null);
  });
  it('should return an error if fetch fails', async () => {
    fetch.mockImplementationOnce(() =>
      Promise.reject(new Error('Fetch failed'))
    );
    const { result, waitForNextUpdate } = renderHook(() => useFetch('https://api.example.com/data'));
    await waitForNextUpdate();
    expect(result.current.loading).toBe(false);
    expect(result.current.error).toBe('Fetch failed');
    expect(result.current.data).toBe(null);
  });
});

GET STARTED TODAY

By leveraging the power of custom hooks, you’ll be able to write simple,  maintainable and readable codes. And trust me, once you get started, you are locked in by the ease these functions bring to your programming journey.

Categories
Best practices General Software Tech

How To Improve Your Website Accessibilty – Victoria Nduka

Have you ever noticed ramps beside staircases at building entrances, like the one in the image below? These ramps aren’t for aesthetics. They were designed to allow disabled individuals access to the building. Buildings with walkways structured like this are considered “accessible”, because they accommodate everyone, ensuring no one is left out.

Nowadays, a lot of interactions happen online. You can shop for groceries from the comfort of your home and get it delivered to you before the day is gone. Just like in physical spaces, our digital world needs to be accessible too. Digital accessibility means making sure websites and apps can be used by everyone.

WHAT IS WEB ACCESSIBILITY?

Web accessibility means designing and developing websites and apps to suit individuals of all kinds (disabled and abled). It ensures that users can perceive, understand, navigate, and interact with your digital content without experiencing challenges that may prevent users from accessing the information or services they need.

To understand how relevant web accessibility is in the digital world, let’s consider its importance:

  1. Legal Requirements: In countries like Israel and the United States of America, some laws and regulations require websites to be accessible. One of such law is the ADA (Americans with Disabilities) complaint law. Not complying with these regulations can lead to legal sanctions.
  2. Better User Experience: When navigation is easy to run through, text is readable, and the user interface is smooth, visitors to the site will have a user experience.
  3. SEO Benefits: Websites designed with accessibility in mind perform better in search engine rankings. Using descriptive text for images (alt text) and organizing content with appropriate heading levels help search engines understand and index your site more effectively.

ACCESSING YOUR CURRENT WEBSITE ACCESSIBILTY

Before making changes to your website’s accessibility, it’s important to
assess its current state. Here are some steps you can take to evaluate the accessibility of your website:

Step 1: Conduct an Accessibility Audit

You can use various tools and techniques to identify accessibility barriers and areas for improvement. Consider the following:

Automated Tools: Use automated accessibility testing tools like WAVE, Axe, or Lighthouse to scan your website for common accessibility issues. These tools identify issues such as missing alt text, colour contrast problems, and keyboard navigation issues
Manual Testing: While automated tools can catch many accessibility issues, some issues require manual testing. Manual testing involves simulating how users with disabilities might interact with your website and identifying any usability barriers they might encounter.
User Testing: You can take your audit a step further by conducting usability testing with individuals who have disabilities. Gather first-hand feedback on their experience using your website. This can provide valuable insights into real-world accessibility issues that automated tools may no

Step 2: Review Accessibility Guidelines

Familiarize yourself with the Web Content Accessibility Guidelines (WCAG) published by the W3C. These guidelines provide a comprehensive set of criteria for making web content more accessible to people with disabilities. Reviewing the WCAG can help you understand the
specific requirements and best practices for accessibility. Then you can determine in what areas your website is falling short.

Step 3: Identify Priority Areas

Once you’ve completed your accessibility audit and reviewed the WCAG, prioritize the accessibility issues you’ve identified. Focus on addressing critical issues that impact the largest number of users or present significant barriers to access. Consider factors such as the severity of the issue, frequency of occurrence, and the potential impact on users.

Step 4: Create an Accessibility Action Plan

Based on your assessment and prioritization, develop a comprehensive accessibility action plan outlining the steps you’ll take to address accessibility issues on your website. Set clear goals, timelines, and responsibilities for implementing accessibility improvements. Your action plan should be flexible and adaptable to accommodate new insights and changes in priorities.

Step 5: Monitor and Iterate

Accessibility is an ongoing process, not a one-time task. Once you’ve implemented accessibility improvements, continue to monitor your website regularly for new accessibility issues and feedback from users. Iterate on your accessibility action plan based on new insights and evolving accessibility requirements.

PRINCIPLES OF WEBSITE ACCESSIBILITY

The foundation of web accessibility lies in four key principles developed by the World Wide Web Consortium (W3C) in a set of guidelines known as the Web Content Accessibility Guidelines (WCAG). These principles, often abbreviated as POUR, form the framework for creating accessible digital experiences. Let’s explore each principle in detail:

  1. Perceivable (P): Perceivable means that users must be able to perceive the information being presented. In other words, the content must be available to at least one of their senses (sight, hearing, touch) so that
    they can access and understand it. Consequently, users with visual impairments, for example, must be able to access web content through other senses or enhanced visual means.
  2. Operable (O): Operable means that users must be able to navigate and interact with the interface. Users may use different ways to interact, like using a keyboard or talking to the device. So, no matter how a user wants to use the website or app, it should work smoothly and be easy to use.
  3. Understandable (U): Understandable means that users should easily understand what they see on the website or app and know how to use it. It requires using clear language and making sure things work in a way
    that users expect without feeling lost or frustrated.
  4. Robust (R): Robust means that your web content is accessible to everyone, regardless of their choice of devices. This includes users who rely on assistive technologies like screen readers, screen magnifiers, or voice recognition software. The robust principle also guarantees that content will remain accessible as technologies evolve.

IMPROVING YOUR WEBSITE USING THE P.O.U.R PRINCIPLE

Now that you’ve assessed your website’s current accessibility status, it’s time to take action to improve it. Let’s explore how you can apply the POUR principles we have discussed earlier to improve the accessibility of your website.

Perceivable (P)

  1. Text Alternatives: Images and multimedia should have text descriptions (alt text) that screen readers can read aloud. Avoid generic descriptions like “Image01.jpg” and write clear, concise text that describes the content of the image. For instance, an image of a dog
    would have an alt text like “Golden Retriever playing in the park.”
  2. Colour Contrast: People with visual impairments may struggle to distinguish between text and background colours if the contrast is poor. Use a colour contrast checker to ensure your text is readable against the background.
  3. Captions: Videos should have captions so that users who are deaf or hard of hearing can read what is being said.
  4. Transcripts: Audio content should have transcripts that provide a written version of the spoken material.

Operable (O)

  1. Keyboard Accessibility: People with motor impairments may have difficulty using a mouse or other pointing device to interact with a website. Ensure your website allows users to navigate through all interactive elements (menus, buttons, links, forms) using just the keyboard. Users should also be able to navigate through the entire site using the Tab key to move forward and Shift+Tab to move backwards.
  2. Seizure Prevention: Be mindful of content that flashes rapidly (more than three times per second) as it can trigger seizures in users with photosensitive epilepsy. Instead, consider using animations without rapid flashing or provide a warning along with the option to pause or stop them.
  3. Navigation Aids: Provide clear and consistent navigation options to help users find content. Use a consistent layout for navigation menus across all pages.

Understandable (U)

  1. Readable Text: Use clear and simple language. Break up text into manageable chunks with headings, lists, and other formatting. Avoid jargon and use short, straightforward sentences.
  2. Predictable Navigation: Ensure that navigation is consistent and predictable. Avoid sudden changes in context. Links should clearly state their destination and buttons should indicate their action.
  3. Input Assistance: Provide help and suggestions for form inputs. Show clear error messages and instructions. Use placeholder text and instructions within forms to guide users.

Robust (R)

  1. Standards Compliance: Use valid, semantic HTML and follow web standards to ensure compatibility with different browsers and assistive technologies. Use proper HTML5 elements and attributes.
  2. Accessible Rich Internet Applications (ARIA) Landmarks: Use ARIA landmarks to improve navigation for users with screen readers. Mark up sections of the page using ARIA roles like role=”banner”, role=”navigation”, and role=”main”.

YOUR NEXT STEP

Congratulations on taking the first steps towards enhancing the accessibility of your website! Improving the accessibility of your website is not just a good thing, it’s simply the right thing to do. Remember that improving your website accessibility is a journey, not a destination. As your
website grows and evolves, revisit these principles and make sure new content adheres to accessibility best practices.

Categories
Best practices General How-Tos

Open-source Contribution Guidelines

One of the easiest ways to convince recruiters to hire you is by showcasing a rich portfolio containing, at least, one open-source contribution project. For entry and junior developers (and maybe senior developers), this is not open for debate as the benefits of contributing to open-source projects are immense. Not only does contributing to open-source projects broaden your experience and skills, but it also provides an orifice of exposure to industry-standard tools and practices.

So, how do you get started?

FIND A PROJECT

The first step is to find an open-source project that interests you. You can start by exploring platforms like GitHub, GitLab, or Bitbucket. These platforms host millions of open-source projects of technologies and domains. Look for projects with a clear and active community, as this will make it easier to get started and receive support.

To find the right project, consider browsing trending repositories or searching for projects based on your interests. Many platforms offer tags or categories that can help you narrow down your search.

For example, if you’re interested in web development, you might search for projects tagged with “JavaScript” or “React.” If you’re into data science, look for projects involving “Python” or “Machine Learning”.

EVALUATE THE PROJECT

Before diving in, take some time to evaluate whether you want to contribute to the project. Consider factors such as:

Project Goals: Ensure the project’s goals align with your interests and objectives. Understanding the project’s mission and vision can help you stay motivated and make meaningful contributions.

Technology Stack: Check whether you’re familiar with the programming languages and tools used in the project. Contributing to a project using a stack you’re comfortable with can help you contribute more effectively and learn faster.

Community: Assess whether the community is active and welcoming to new contributors. An active community often means better support and more opportunities for collaboration. Look at the project’s issue tracker, pull request activity, and community forums or chat groups to gauge this.

READ DOCUMENTATION

Familiarize yourself with the project’s documentation. Most projects have detailed documentation that explains how the software works, how to set it up locally, and how to contribute to it. Reading the documentation will give you a good overview of the project’s architecture, coding standards, and contribution process.

Good documentation typically includes a README file with an introduction to the project, installation instructions, and a contribution guide. Some projects also have a Code of Conduct, which outlines the expected behavior of contributors. Pay attention to these documents as they provide essential information for new contributors.

FIND AN ISSUE TO WORK ON

After reading the documentation, it’s time to find an issue to work on. Most open-source projects use issue trackers to keep track of bugs, feature requests, and other tasks. Look for issues labeled as “good first issue” or “beginner-friendly” as these are usually suitable for newcomers. You can also filter issues based on your skill level, the type of task, or the programming language you’re comfortable with.

When selecting an issue, start with something small and manageable. This will help you get acquainted with the project’s workflow and build confidence. As you gain more experience, you can gradually take on more complex issues.

GATHER MORE INFORMATION

Once you’ve found an issue you’d like to work on, it’s essential to gather more information. Here are some steps you can take:

Read Comments and Discussions: Many issues have comments and discussions that provide additional context or clarify the problem. Reading through these can help you understand the issue better and avoid redundant efforts.

Ask Questions: If you have any doubts or need more information, don’t hesitate to ask questions in the project’s chat or forum. The project maintainers and other contributors will be happy to help you get started and provide guidance along the way.

Review Related Code: Sometimes, looking at related code or previous pull requests can provide insights into how similar issues were resolved. This can help you understand the coding standards and practices followed by the project.

WORK ON YOUR SOLUTION

With all the necessary information at hand, it’s time to start working on your solution. Here’s what you should do:

Fork the Repository: Fork the project’s repository to your own GitHub account. This creates a copy of the project where you can make changes without affecting the main codebase.

Create a New Branch: Create a new branch for your changes. It’s good practice to name your branch descriptively, such as “fix-issue-123” or “add-feature-x.”

Follow Coding Standards: Adhere to the project’s coding standards and conventions. This ensures that your code is consistent with the rest of the codebase and makes it easier for maintainers to review your changes.

Write Clear and Focused Code: Keep your changes focused and well-documented. Write clear commit messages that explain the purpose of each change. This helps maintainers understand your work and makes it easier to track changes.

SUBMIT YOUR SOLUTION

Once you’ve completed your solution, it’s time to submit it for review:

Create a Pull Request (PR): Create a pull request on the project’s repository. This notifies the maintainers that you’ve made changes and would like them to be reviewed and merged into the main codebase.

Describe Your Changes: In your pull request description, explain the problem you’re solving and the solution you’re proposing. Reference the issue you’re addressing and provide any relevant context or information.

Respond to Feedback: The project maintainers and other contributors will review your code, provide feedback, and help you make any necessary changes. Be open to feedback and willing to make revisions to improve your contribution.

Once your PR has been approved, your changes will be merged into the main codebase, and you’ll have made your first open-source contribution. Celebrate this milestone and take pride in your achievement.

ADDITIONAL TIPS

Be Patient and Open to Feedback: Open source projects often have many contributors and maintainers with different opinions and approaches. Be patient when waiting for feedback and open to constructive criticism.

Respect the Community: Adhere to the project’s Code of Conduct and respect the community guidelines. Maintaining a positive and respectful attitude fosters a welcoming environment for all contributors.

Keep Learning: Continuously improve your skills by learning from other contributors and exploring new technologies. The more you learn, the more valuable your contributions will become.

Ask for Help: Don’t be afraid to ask for help or clarification when needed. The open-source community is generally supportive and eager to assist newcomers.

Document Your Journey: Keep track of your contributions and document your learning process. This can be valuable for your personal growth and can also help you showcase your experience to potential employers.

Network with Other Contributors: Engaging with other contributors can lead to valuable connections and collaborations. Attend meetups, join community chats, and participate in discussions to expand your network.

Stay Updated: Open source projects are constantly evolving. Stay updated with the latest changes by following the project’s repository, joining mailing lists, or subscribing to newsletters. This ensures you are aware of new issues, features, and updates.

Contribute Beyond Code: Contributions to open-source projects are not limited to code. You can help by writing documentation, designing graphics, managing community events, or even translating content. These contributions are equally valuable and help the project thrive.

CONCLUSION

Contributing to open source projects is a rewarding experience that allows you to learn new skills, connect with other developers, and give back to the community. By following these simple steps, you can make your first contribution with confidence and start making a positive impact on the world of open source software.

Remember that every contribution, no matter how small, adds value to the project and the community. Whether you’re fixing a typo in the documentation, resolving a bug, or adding a new feature, your efforts are appreciated.

Categories
Build4SocialGood Hackathon Tech Tech For Good Techrity Programmes

Hack for Good: ReForestAI: Virtual Hackathon Challenge Accepted

My name is Lesley John-Jumbo. I am 18 years old and an embedded systems developer. I like to explore the realms of Artificial Intelligence and Robotics.

My team members: Blessed Pepple (19, Hardware designer), Bright Sunday (17, Embedded systems engineering specialist) and I recently developed a project called, “ReForestAI” for the HackforGood hackathon challenge 2023 organized by Techrity.

Problem Statement

Illegal logging has deteriorated the forest ecosystem, leading to the deforestation and extinction of some animals. The problem of deforestation poses harmful threats to biodiversity, carbon sequestration, and cultural heritage, emphasizing the urgent need for effective forest conversation and protective measures. And here comes ReForestAI.

Solution Overview

ReForestAI is a project that harnesses artificial intelligence, robotics and environmental science to tackle one of Africa’s most pressing environmental issues—deforestation. With ReForestAI, the global governments and environmental biologists can combat illegal logging and revive the forest ecosystem again.

Challenges Faced

For this project, we stepped out on a completely new terrain. We experienced difficulties with advanced batteries and was bamboozled by the unfamiliar electrical connections we tried. I would say these setbacks occurred because we tried new construction methods for the project.

But thanks to our thorough research skills, we found a way to correct the wiring without overloading the components with a high voltage capacity. In turn, not only did this aggressive research pay off in saving our project, we learnt a lot as a team. 

Aside from the hiccups we faced in our construction method, we also battled with unstable power supply in Port-Harcourt. To solve this, we used a friend’s robotics workstation, which operated on solar power. At night, after our friend’s operating hours, we continued building, demonstrating our commitment to overcoming challenges and advancing our project despite external limitations.

Technologies Used

  1. AI and Machine Learning: We used tailor-made AI models for detecting deforestation and performing predictive analytics.
  2. Robotics: With AI embedded robots, we monitored the forest.
  3. Cloud computing: We used expandable cloud infrastructure for processing and storing data.
  4. IoT Sensors: IoT was used as an environmental sensors for collecting data.

View the ReforestAI project demo here or view the code submission on GitHub

Hackathon Experience

A special highlight for me during this hackathon challenge was the improvement of my circuit design skills. I learned the importance of running and testing codes in increments and meticulously defining algorithms based on specific circumstances. With this new knowledge I learnt, debugging my codes became a lot easier. 

ReforestAI Presentation at Tech for Good 2023

For my team also, our journey was punctuated with memorable moments that highlighted our individual growth. Despite our strong belief in the success of our project, we stayed grounded, acknowledging that the experience gained was a victory in itself no matter the outcome of the result. This perspective propelled us forward, creating an environment where learning and growth were just as important as the outcome.

Future Developments

Our vision goes beyond what we see; we aspire to scale this project globally by partnering with international entities, and building a network that will amplify our project’s reach.

Conclusion

We are sincerely thankful for the opportunity given to us by Techrity to participate in this hackathon challenge. The hackathon not only enabled us to showcase our skills but also offered an environment that fostered growth and creativity.

Categories
Career advice Software

Top 5 Data Analyst Skills in 2023

As a data analyst expert or newbie, have you ever wondered how you can stay relevant in the 2023 job market with the skills you currently have?

In this article, we’ll provide you with the top 5 must-have skills every data analyst should get familiar with or even more familiar with — if you already know it — in 2023.

Aside helping organizations employ business data to make profitable and accurate decisions, a data analyst should also be able to visualize data and give expert reports on how this data can

To stay on course, here are top 5 skills you should stick with as a data professional in 2023.

Top 5 Data Analyst Skills in 2023

  1. Spreadsheet Proficiency

Microsoft Excel is that tool for data cleaning and analytical activities, like mini data cleaning and exploration, simple interactive dashboards with pivot charts, and even advanced Excel using VBA to automate the analytical process. If you are a data noob, Excel is a perfect catch as you can manipulate and analyze data without knowing how to use programming technologies like R or Python. 

  1. SQL and Database Management 

SQL or Structured Query Language is crucial for interacting with the database. It handles large data sizes that spreadsheets can’t handle (e.g., billions of rows).

Analysts use SQL for the following reasons:

  • Query the data in the database.
  • Insert data into the database.
  • Update the database,
  • Modify schemas (i.e. database structure).
A visual display of an SQL tool

SQL mastery is a skill demanded by over 80% of data analyst job descriptions

3. Data Visualization

Stakeholders understand data better through visuals and reports. You must know how to present your findings in simple graphs. 

A customer sales dashboard
A dashboard with several visuals of a customer’s purchases for a company.

Tools like PowerBI, Tableau, and Looker are essential for communicating insights to stakeholders who may not understand the underlying code. Because these tools help to craft visually compelling representations that reveal the narrative hidden within the data

4. Statistical Programming Languages

Data analysts use programming languages like Python or R to perform statistical functions or programs within a company’s data. These tools can help you quickly analyze and generate insights from large datasets.  Some of the top programming languages used by data professionals include

  • R
  • Python
  • Java
  • Scala

Soft Skills for Data Analysts

While technical skills are crucial, complementing them with soft skills puts you in a stronger position than an analyst with only hard skills. Here’s a list of soft skills you need as a data analyst in 2023.

  1. Critical thinking.
  2. Problem-solving skills.
  3. Affinity for numbers.
  4. Logical and analytical mindset.
  5. Communication.

Conclusion

  • The data world is evolving, but there are specific tools that you must have at all times.
  • To succeed as a data analyst, you must master spreadsheets, SQL, database management, data cleaning, and visualization.
  • Hard skills are only useful when combined with soft skills. Among the top 5 are communication, critical thinking, problem-solving, numbers affinity, and logical and analytical thinking.
Categories
Getting started Kickstart Software Tech

Crafting Dynamic and Responsive Web Layouts with Bootstrap CSS

In the ever-evolving world of software engineering, creating websites that look and function well across various devices is no longer a luxury; it is a necessity. This is where Bootstrap CSS comes into play. Bootstrap, a popular front-end framework, has revolutionized the way web developers approach responsiveness since its release in 2011.

Bootstrap CSS, alongside other CSS frameworks, such as Tailwind CSS, Foundation, Bulma, Skeleton, etc., has simplified the complexities of creating responsive layouts for websites.

In this comprehensive guide, I will take you on a journey through the fundamentals of Bootstrap and show you how to harness its power to bootstrap stunning and responsive layouts for your web projects.

Bootstrap home

What is Bootstrap?

At its core, Bootstrap is a comprehensive set of HTML, CSS, and JavaScript components and tools designed to simplify web development. It provides developers with a solid foundation upon which to build responsive and visually appealing websites and web applications. Bootstrap’s primary focus is responsive design, ensuring that your website or web application adapts seamlessly to different screen sizes, from the smallest smartphones to the largest desktop monitors.

Bootstrap’s feature set includes a responsive grid system, an extensive library of pre-built UI components, (such as navigation bars, buttons, forms, cards, pagination, badges, navbar, modals, etc.), and a wealth of CSS classes for styling and layout control.

In addition to these components, Bootstrap offers optional JavaScript plugins to improve user interactions and functionality.

Advantages of Choosing Bootstrap

Now that you have a basic understanding of what Bootstrap is, let’s explore why it has become the go-to choice for countless web developers:

1. Rapid Development: Bootstrap significantly accelerates the development process. It provides pre-designed components and a responsive grid system that allows developers to focus on creating content and functionality rather than starting from scratch with every project.

2. Consistency: Bootstrap enforces design consistency throughout your website or application. This is especially valuable when collaborating with multiple developers or designers, as it establishes a common design language and style guide.

3. Responsiveness: With Bootstrap, responsiveness is built-in. Your layouts will automatically adapt to different screen sizes, ensuring a seamless user experience on everything from mobile devices to desktops.

4. Customization: While Bootstrap comes with a sleek default theme, it is highly customizable. You can easily modify its appearance to match your project’s branding or create unique designs using Bootstrap as a foundation.

5. Strong Community and Resources: Bootstrap boasts a vibrant community of developers and a wealth of documentation, tutorials, and third-party themes and plugins. This makes it easy to find solutions to common challenges and stay up-to-date with best practices.

Now that we have scratched the surface of Bootstrap’s capabilities and you have read some of its advantages, let’s delve deeper into the practical aspects of getting started with Bootstrap in the next section.

Getting Started with Bootstrap

Bootstrap offers a quick and straightforward way to include its production-ready CSS and JavaScript in your project without the need for complex build steps.

Here is a step-by-step guide to help you get started:

Bootstrap provides a Content Delivery Network (CDN) that allows you to easily include its CSS and JavaScript files in your project. This means you can get up and running with Bootstrap in no time.

1. Create an HTML file

Start by creating a new index.html file in the root directory of your project. This file will serve as the entry point for your web application.

<!doctype html>
<html lang="en">
  <head>
    <meta charset="utf-8">
    <meta name="viewport" content="width=device-width, initial-scale=1">
    <title>Bootstrap Demo</title>
  </head>
  <body>
    <!-- Your content goes here -->
  </body>
</html>

In this basic HTML template, you just included the essential meta tags for character encoding and responsive behavior. These tags ensure that your web page looks great on various devices, from smartphones to desktops.

2. Include Bootstrap’s CSS

Include Bootstrap’s CSS to style your web page by placing the <link> tag in your HTML document’s <head> section.

This <link> tag references Bootstrap’s CSS file from the CDN, ensuring that your web page is styled according to Bootstrap’s design principles.

<!doctype html>
<html lang="en">
  <head>
    <meta charset="utf-8">
    <meta name="viewport" content="width=device-width, initial-scale=1">
    <title>Bootstrap Demo</title>
    <link href="<https://cdn.jsdelivr.net/npm/bootstrap@5.2.3/dist/css/bootstrap.min.css>" rel="stylesheet" integrity="sha384-rbsA2VBKQhggwzxH7pPCaAqO46MgnOM80zW1RWuH61DGLwZJEdK2Kadq2F9CUG65" crossorigin="anonymous">
  </head>
  <body>
    <!-- Your content goes here -->
  </body>
</html>

3. Include Bootstrap’s JavaScript

To make use of Bootstrap’s interactive components and functionality, including its JavaScript, place the <script> tag for Bootstrap’s JavaScript bundle just before the closing </body> tag of your HTML document.

<!doctype html>
<html lang="en">
  <head>
    <meta charset="utf-8">
    <meta name="viewport" content="width=device-width, initial-scale=1">
    <title>Bootstrap Demo</title>
    <link href="<https://cdn.jsdelivr.net/npm/bootstrap@5.2.3/dist/css/bootstrap.min.css>" rel="stylesheet" integrity="sha384-rbsA2VBKQhggwzxH7pPCaAqO46MgnOM80zW1RWuH61DGLwZJEdK2Kadq2F9CUG65" crossorigin="anonymous">
  </head>
  <body>
    <!-- Your content goes here -->
    <script src="<https://cdn.jsdelivr.net/npm/bootstrap@5.2.3/dist/js/bootstrap.bundle.min.js>" integrity="sha384-kenU1KFdBIe4zVF0s0G1M5b4hcpxyD9F7jL+jjXkk+Q2h455rYXK/7HAuoJl+0I4" crossorigin="anonymous"></script>
  </body>
</html>

By including this <script> tag, you are not only adding Bootstrap’s JavaScript but also Popper, a library used for positioning dropdowns, popovers, and tooltips. This ensures that your Bootstrap components function correctly.

4. Optional: Include Popper and Bootstrap JavaScript Separately

If you do not plan to use dropdowns, popovers, or tooltips, you have the option to include Popper and Bootstrap JavaScript separately. This can help save some kilobytes by not including Popper when it is unnecessary.

<script src="<https://cdn.jsdelivr.net/npm/@popperjs/core@2.11.6/dist/umd/popper.min.js>" integrity="sha384-oBqDVmMz9ATKxIep9tiCxS/Z9fNfEXiDAYTujMAeBAsjFuCZSmKbSSUnQlmh/jp3" crossorigin="anonymous"></script>

<script src="<https://cdn.jsdelivr.net/npm/bootstrap@5.2.3/dist/js/bootstrap.min.js>" integrity="sha384-cuYeSxntonz0PPNlHhBs68uyIAVpIIOZZ5JqeqvYYIcEL727kskC66kF92t6Xl2V" crossorigin="anonymous"></script>

In our example, we will not be using Popper, as we are only interested in the grid system provided by Bootstrap for a responsive layout.

Your HTML file should look like this (without Popper):

<!doctype html>
<html lang="en">
  <head>
    <meta charset="utf-8">
    <meta name="viewport" content="width=device-width, initial-scale=1">
    <title>Bootstrap Demo</title>
    <link href="<https://cdn.jsdelivr.net/npm/bootstrap@5.2.3/dist/css/bootstrap.min.css>" rel="stylesheet" integrity="sha384-rbsA2VBKQhggwzxH7pPCaAqO46MgnOM80zW1RWuH61DGLwZJEdK2Kadq2F9CUG65" crossorigin="anonymous">
  </head>
  <body>
    <!-- Your content goes here -->
    <script src="<https://cdn.jsdelivr.net/npm/bootstrap@5.2.3/dist/js/bootstrap.min.js>" integrity="sha384-cuYeSxntonz0PPNlHhBs68uyIAVpIIOZZ5JqeqvYYIcEL727kskC66kF92t6Xl2V" crossorigin="anonymous"></script>
  </body>
</html>

With these steps, you have successfully set up Bootstrap in your project, allowing you to take advantage of its responsive grid system and pre-designed UI components. In the upcoming sections of this article, we will explore how to leverage Bootstrap’s features to create stunning, responsive layouts for your web projects.

Creating Responsive Layouts with Bootstrap

This flexible and powerful system uses a combination of containers, rows, and columns, all built with the power of Flexbox, to help you achieve pixel-perfect alignment and responsiveness across a wide range of devices and screen sizes.

Bootstrap Grid System

Understanding the Bootstrap Grid System

Before we delve into the specifics, let’s understand the fundamental components of the Bootstrap grid system:

  • Containers: Containers provide the outermost wrapper for your content. They help center your content and provide padding on the left and right sides. Bootstrap offers both fixed-width (container) and full-width (container-fluid) containers.
  • Rows: Rows are used to contain and clear a set of columns. They ensure that columns align well and do not overlap. Rows are placed inside containers.
  • Columns: Columns are the building blocks of your layout. You can specify how many columns each element should span, and Bootstrap will take care of the rest. Columns are placed inside rows.

Now, let’s explore some practical applications of this grid system.

Auto-layout Columns

Bootstrap offers a variety of ways to create responsive columns without the need for explicit numerical classes like .col-sm-6. These auto-layout columns adapt automatically to different screen sizes.

Equal-width Columns

You can create equal-width columns that apply to every device and viewport, from extra-small (xs) to extra-extra-large (xxl). Add unit-less classes to specify how many columns you need, and Bootstrap ensures that each column is of the same width.

<div class="container text-center">
  <div class="row">
    <div class="col">
      1 of 2
    </div>
    <div class="col">
      2 of 2
    </div>
  </div>
  <div class="row">
    <div class="col">
      1 of 3
    </div>
    <div class="col">
      2 of 3
    </div>
    <div class="col">
      3 of 3
    </div>
  </div>
</div>


In the example above, we have two rows, each containing equal-width columns. Whether on a large desktop screen or a mobile device, these columns will adjust automatically to occupy the available space evenly.

Bootstrap example - Equal-width Columns

Setting One Column Width

Bootstrap’s auto-layout for flexbox grid columns allows you to set the width of just one column, and the sibling columns will automatically resize around it. You can achieve this using predefined grid classes, grid mixins, or inline widths.

<div class="container text-center">
  <div class="row">
    <div class="col">
      1 of 3
    </div>
    <div class="col-6">
      2 of 3 (wider)
    </div>
    <div class="col">
      3 of 3
    </div>
  </div>
  <div class="row">
    <div class="col">
      1 of 3
    </div>
    <div class="col-5">
      2 of 3 (wider)
    </div>
    <div class="col">
      3 of 3
    </div>
  </div>
</div>

In this example, the second column is explicitly set to be wider (col-6 and col-5, respectively), and the other columns adjust their widths accordingly. This flexibility makes it easy to create complex layouts that adapt beautifully to various screen sizes.

Bootstrap example - Setting One Column Width

Wrapping Up

Bootstrap is generally considered an opinionated library, which means it has a set of assumptions and guidelines for building responsive and mobile-first web applications. While it offers a wide range of customizable components and tools, it is designed to be used in a specific way to achieve consistent and predictable results.

Using Bootstrap to quickly bootstrap your web development project sets you one step ahead and brings you closer to completing your development in no time. This is because you no longer have to worry about the hard parts, such as stylings, responsiveness, components, etc. because Bootstrap takes care of those.

In this article, walked through setting up Bootstrap in your web project. By embracing Bootstrap, you not only save time but also ensure your projects look exceptional on screens of all sizes, thus enabling you to build mobile-friendly websites.

Further Readings

Video Tutorials

Bootstrap Tutorial - YouTube
Bootstrap Grid System Tutorial | Bootstrap 5 - YouTube
Bootstrap 5 Crash Course Tutorial #1 - Intro & Setup - YouTube
Categories
Getting started How-Tos Tech

Getting Started with Power BI: A Step-by-Step Guide for Beginners

In today’s data-driven world, the ability to transform raw data into actionable insights is a valuable skill. Power BI, a business intelligence tool developed by Microsoft, is a powerful tool that allows you to do just that. Whether you’re a business analyst, data scientist, or simply someone interested in harnessing the power of data, this step-by-step guide for beginners will help you get started with Power BI.

How Does Power BI Work?

Before we dive into the technical aspects, let’s understand what Power BI is and how it works. Power BI is a business intelligence tool that enables users to connect to various data sources, transform raw data into meaningful visualisations, and share these insights with others. It is a suite of tools and services with varying possibilities like; Power BI Desktop, Power BI Service (for online collaboration), and Power BI Mobile (for on-the-go access).

Power BI works by following these key steps:

  • Data Ingestion: Power BI can connect to a wide range of data sources, including databases, spreadsheets, and cloud-based services. It imports or connects to this data to create a dataset.
  • Data Transformation: Once the data is loaded, you can clean, transform, and shape it using Power Query, a built-in data preparation tool. This ensures that your data is accurate and suitable for analysis.
  • Data Modelling: Power BI uses a modelling language called DAX (Data Analysis Expressions) to create relationships between tables and define calculated measures. This step is crucial for creating meaningful visualisations.
  • Visualisation: You can create a variety of visualisations, such as charts, graphs, and tables, to represent your data in a visually appealing and understandable format.
  • Report Building: Power BI also allows you to create interactive reports by adding visualisations, text boxes, and slicers to a canvas. Users can interact with these reports to gain insights.
  • Sharing and Collaboration: You can publish your reports and dashboards to the Power BI Service, making them accessible to others. This enables collaboration and real-time sharing of insights.

Now that you have a basic understanding of how Power BI works, let’s explore how it compares to other popular data analysis tools.

Power BI, Excel, and Tableau: How They Compare and Differ

Power BI, Excel, and Tableau are all powerful tools for data analysis, but they serve different purposes and have distinct features:

  • Excel: Excel is a familiar spreadsheet tool that many professionals use for data analysis. It is suitable for small-scale data analysis and reporting. Power BI, on the other hand, is designed for larger datasets and offers more advanced visualisation options and data modelling capabilities.
  • Tableau: Tableau is another popular data visualisation tool. While Tableau is known for its flexibility and robust visualisation capabilities, Power BI is often preferred by organisations that already use Microsoft products, as it seamlessly integrates with other Microsoft tools like Excel and SharePoint.
  • Power BI: Power BI is a dedicated business intelligence tool that offers a wide range of data connectors, data modelling capabilities, and interactive visualisations. It excels in creating interactive dashboards and sharing insights with colleagues.

Installing Power BI for Desktop

Getting started with Power BI is easy. Follow these steps to install Power BI Desktop:

Step 1: Visit the Microsoft Official Download Centre website (https://www.microsoft.com/en-us/download/details.aspx?id=58494) Select language and click the “Download” button.

Step 2: Select ” PBIDesktopSetup.exe ” or “PBIDesktopSetup_x64.exe” and click the “Download” button.


Step 3: Run the downloaded installer file.

Step 4: Accept the licence agreement and follow the on-screen instructions to complete the installation.


Step 5: Once installed, launch Power BI Desktop.

Now you have Power BI Desktop installed and ready to use.

Additional Tips for Getting Started with Power BI

While we’ve covered the basics, there are a few more tips to help you get started with Power BI:

  • Explore the Power BI Community: Join the Power BI Community to ask questions, share your insights, and learn from experienced users.
  • Take Online Courses: Microsoft offers free online courses and tutorials to help you master Power BI. These courses cover everything from data modelling to advanced visualisation techniques.
  • Practice, Practice, Practice: The best way to learn Power BI is by using it regularly. Start with simple projects and gradually work your way up to more complex analyses.
  • Stay Updated: Power BI is continually evolving, with new features and updates released regularly. Stay informed about the latest developments to make the most of this powerful tool.

Conclusion

Getting started with Power BI may seem daunting at first, but with the right guidance and a bit of practice, you can unlock the potential of your data and turn it into valuable insights. Start your Power BI journey today and watch your data come to life.

Categories
General Software Team Management Tech

The Software Development Lifecycle

Picture a gourmet chef in a kitchen: his ingredients arranged atop a wooden table, apron firmly girded around his torso and neck, hands on a sharp-edged knife chopping a piece of steak with dexterity.

Without a doubt, he knows the right amount of seasoning he needs in preparing a sumptuous meal.


The Tech Industry functions in the same way, but with a different terminology. In order to build software that will solve everyday problems in the world, Software Engineers implore a recipe called: The Software Development Life Cycle (SLDC).

In this article, I’ll take you through the intriguing world of SLDC.

What is the Software Development Lifecycle?

Various tech organizations and blogs have provided different definitions of the Software Development Life Cycle (SDLC).

According to AWS, it is a methodical and resource-efficient approach employed by development teams to conceive, create, and deliver top-notch software within a defined time and budget constraint.

On the other hand, GeeksforGeeks defined it as a well-structured and systematic process employed to conceive, craft, and test good quality software.


Drawing from these perspectives, I’ll interpret the Software Development Life Cycle as a systematic approach employed by development teams to plan, design, build, and thoroughly test software and its related products.

Phases Involved in Software Development Lifecycle

A typical Software Development Life Cycle run through the following stages:
· Planning
· Requirement gathering and analysis
· Designing the product architecture
· Development
· Product testing and integration
· Deployment and maintenance of products


Planning
This is the beginning of the cycle, where project goals, objectives, requirements, and budget are discussed. Inputs are collected from various stakeholders who have a vested interest in the project. The team at this stage determines the feasibility of the project and how they can implement it with minimum risk.

Requirements Gathering and Analysis
All the requirements for the project are specified. The different goals and objectives outlined in the planning stage are collated into clear requirements for the development team. The team uses the collected data to create a formal working document known as a Software Requirement Specification (SRS) document. After this document has been reviewed and approved by stakeholders, it serves as a guide throughout the designing and development process.


Designing the Product Architecture
During this stage, the Software Requirement Specification (SRS) document is translated into design designers create and test several designs and ideas before selecting the final prototype to the team an idea of what the product will look like, and make changes, without having to write code.


Development
The development phase divides tasks in the project into modules and assigns them to the different programmers in the team. In this phase, the software requirements outlined in the project are translated into code, using the chosen programming language. This phase is usually the longest phase of the Software Development Life Cycle Process.


Product Testing and Deployment
At this stage, several tests like unit testing, acceptance testing, integration testing, etc. are carried out to ensure the product solves the needs outlined in the requirements. The Quality Assurance team usually does this. The developers fix any bug reported by the QA team, and the product is tested again, till the software is free of bugs. After passing through this rigorous process, the product is ready for deployment.

Maintenance
This phase ensures the software continues to run as it is intended to. In this stage, the team resolves customer issues, fix bugs, monitor the performance of the software, and identifies new ways to improve the user experience.

The SDLC process may restart to release an update to the software.

Conclusion

By following this systematic journey through planning, design, development, testing, deployment, and maintenance, development teams can deliver high-quality software that meets user needs and adheres to project constraints.